Thoughts on web development, tech, and life.

Category: Web development (Page 1 of 3)

Dreaming big

dreamscape-detail

I’ve recently been working on a side project with my good friend Chris Lamb to scale up Google’s Deep Dream neural net visualization code to operate on giant (multi-hundred megapixel) images without crashing or taking an eternity. We recently got it working, and our digital artist friend (and fellow Plaxo alum!) Dan Ambrosi has since created some stunning work that’s honestly exceeded all of our expectations going in. I thought it would be useful to summarize why we did this and how we managed to get it working.

Even if you don’t care about the technical bits, I hope you’ll enjoy the fruits of our labor. 🙂

The ”˜danorama’ back story

gridDan’s been experimenting for the past several years with computational techniques to create giant 2D-stitched HDR panoramas that, in his words, “better convey the feeling of a place and the way we really see it.” He collects a cubic array of high-resolution photos (multiple views wide by multiple views high by several exposures deep). He then uses three different software packages to produce a single seamless monster image (typically 15-25k pixels wide): Photomatix to blend the multiple exposures, PTGui to stitch together the individual views, and Photoshop to crop and sweeten the final image. The results are (IMO) quite compelling, especially when viewed backlit and “life size” at scales of 8’ wide and beyond (as you can do e.g. in the lobby of the Coastside Adult Day Health Center in Half Moon Bay, CA).

“I’d like to pick your brain about a little something”¦”

Dan AmbrosiWhen Google first released its deep dream software and corresponding sample images, everyone went crazy. Mostly, the articles focused on how trippy (and often disturbing) the images it produced were, but Dan saw an opportunity to use it as a fourth tool in his existing computational pipeline–one that could potentially create captivating impressionistic details when viewed up close without distorting the overall gestalt of the landscape when viewed at a distance. After trying and failing to use the code (or any of the DIY sites set up to run the code on uploaded images) on his giant panoramas (each image usually around 250MB), he pinged me to ask if I might be able to get it working.

I had no particular familiarity with this code or scaling up graphics code in general, but it sounded like an interesting challenge, and when I asked around inside Google, people on the brain team suggested that, in theory, it should be possible. I asked Chris if he was interested in tackling this challenge with me (both because we’d been looking for a side project to hack on together and because of his expertise in CUDA, which the open source code could take advantage of to run the neural nets on NVIDIA GPUs), and we decided to give it a shot. We picked AWS EC2 as the target platform since it was an easy and inexpensive way to get a linux box with GPUs (sadly, no such instance types are currently offered by Google Compute Engine) that we could hand off to Dan if/when we got it working. Dan provided us with a sample giant panorama image, and off we set.

“We’re gonna need a bigger boat…”

18-KolobCanyon_megoHDR60-1600Sure enough, while we could successfully dream on small images, as soon as we tried anything big, lots of bad things started happening. First, the image was too large to fit in the GPU’s directly attached memory, so it crashed. The neural nets are also trained to work on fixed-size 224×224 pixel images, so they had to downscale the images to fit, resulting in loss of detail. The solution to both problems (as suggested to me by the deep dream authors) was to iteratively select small sub-tiles of the image and dream on them separately before merging them back into the final image. By randomly picking the tile offsets each time and iterating for long enough, the whole image gets affected without obvious seams, yet each individual dreaming run is manageable.

Once we got that working, we thought we were home free, but we still couldn’t use the full size panoramas. The GPUs were fine now, but the computer itself would run out of RAM and crash. We thought this was odd since, as mentioned above, even the largest images were only around 250MB. But of course that’s compressed JPEG, and the standard Python Imaging Library (PIL) that’s used in this code first inflates the image into an uncompressed 2D array where each pixel is represented by 3×32 bits (one per color channel), so that the same image ends up needing 3.5GB (!) of RAM to represent. And then that giant image is copied several more times by the internal code, meaning even our beefiest instances were getting exhausted.

So we set about carefully profiling the memory usage of the code (and the libraries it uses like NumPy) and looking for opportunities to avoid any copying. We found the memory_profiler module especially helpful, as you can annotate any suspicious methods with @profile and then run python -m memory_profiler your_code.py to get a line-by-line dump of incremental memory allocation. We found lots of places where a bit of rejiggering could save a copy here or there, and eventually got it manageable enough to run reliably on EC2’s g2.8xlarge instances. There’s still more work we could do here (e.g. rewriting numpy.roll to operate in-place instead of copying), but we were satisfied that we could now get the large images to finish dreaming without crashing.

BTW, in case you had any doubts, running this code on NVIDIA GPUs is literally about 10x faster than CPU-only. You have to make sure caffe is compiled to take advantage of GPUs and tell it explicitly to use one during execution, but trust me, it’s well worth it.

Solving the “last mile” problem

new-dreamWith our proof-of-concept in hand, our final task was to package up this code in such a way that Dan could use it on his own. There are lots of tweakable parameters in the deep dream code (including which layer of the deep neural net you use to dream, how many iterations you run, how much you scale the image up and down in the process, and so on), and we knew Dan would have to experiment for a while to figure out what achieved the desired artistic effect. We started by building a simple django web UI to upload images, select one for dreaming, set the parameters, and download the result. The Material Design Lite library made it easy to produce reasonably polished looking UI without spending much time on it. But given how long the full images took to produce (often 8-10 hours, executing a total of 70-90 quadrillion (!) floating point operations in the process), we knew we’d like to include a progress bar and enable Dan to kick off multiple jobs in parallel.

Chris took the lead here and set up celery to queue up dispatching and controlling asynchronous dreaming jobs routed to different GPUs. He also figured out how to multiply together all the various sub-steps of the algorithm to give an overall percentage complete. Once we started up the instance and the various servers, Dan could control the entire process on his own. We weren’t sure how robust it would be, but we handed it off to him and hoped for the best.

“You guys can’t believe the progress i’m making”

dreamingOnce we handed off the running EC2 instance to Dan, we didn’t hear much for a while. But it turned out that was because he was literally spending all day and night playing with the tools and honing his process. He started on a Wednesday night, and by that Saturday night he messaged us to say, “You guys can’t believe the progress I’m making. I can hardly believe it myself. Everything is working beautifully. If things continue the way they are, by Monday morning I’m going to completely amaze you.” Given that we’d barely gotten the system working at all, and that we still really didn’t know whether it could produce truly interesting output or not, this was certainly a pleasant surprise. When we probed a bit further, we could feel how excited and energized he was (his exact words were, “I’m busting, Jerry, I’m busting!”). It was certainly gratifying given the many late nights we’d spent getting to this point. But we still didn’t really know what to expect.

The following Monday, Dan unveiled a brand new gallery featuring a baker’s dozen of his biggest panoramic landscapes redone with our tool using a full range of parameter settings varying from abstract/impressionistic to literal/animalistic. He fittingly titled the collection “Dreamscapes”. For each image, he shows a zoomed-out version of the whole landscape that, at first glance, appears totally normal (keep in mind the actual images are 10-15x larger in each dimension!). But then he shows a series of detail shots that look totally surreal. His idea is that these should be hung like giant paintings 8-16’ on a side. As you walk up to the image, you start noticing the surprising detail, much as you might examine the paint, brush strokes, and fine details on a giant painting. It’s still hard for me to believe that the details can be so wild and yet so invisible at even a modest distance. But as Dan says in his intro to the gallery, “we are all actively participating in a shared waking dream. Science shows us that our limited senses perceive a tiny fraction of the phenomena that comprise our world.” Indeed!

From dream to reality

galleryWhile Dan is still constantly experimenting and tweaking his approach, the next obvious step is to print several of these works at full size to experience their true scale and detail. Since posting his gallery, he’s received interest from companies, conferences, art galleries, and individuals, so I’m hopeful we’ll soon be able to see our work “unleashed” in the physical world. With all the current excitement and anxiety around AI and what it means for society, his work seems to be striking a chord.

Of course the confluence of art and science has always played an important role in helping us come to terms with the world and how we’re affecting it. When I started trying to hack on this project in my (copious!) spare time, I didn’t realize what lay ahead. But I find myself feeling an unusual sense of excitement and gratitude at having helped empower an artistic voice to be part of that conversation. So I guess my take-away here is to encourage you to (1) not be afraid to try and change or evolve open source software to meet a new need it wasn’t originally designed for, and (2) don’t underestimate the value in supporting creative as well as functional advances.

Dream on!

Winning Market Share in the Sharing Market

[Usual disclaimer: I currently work for Google on Google+ (which I think is awesome), but as always the thoughts on this blog are purely my personal opinion as a lifelong technology lover and builder.]

At the core of innovation in social networking is the competition to be a user’s tool of choice when they have something to share. Most people go to social networks because their friends are sharing there, and there is an inherit scarcity to compete for because most people aren’t willing to share something more than once (some may syndicate their content elsewhere, if permitted, but the original content is usually shared on a single service). Thus every time people are moved to share, they must choose which tool to use (if any)–a social network, via email/sms, etc.

Conventional wisdom holds that the main factor determining where a user will share is audience size (i.e. where they have the most friends/followers, which for most people today means Facebook or Twitter), but the successful rise of services like Foursquare, Instagram, Path, Tumblr, and Google+ shows that there’s more to the story. Despite the continued cries of “it’s game-over already for social networking” or “these services are all the same”, I don’t think that’s the case at all, and apparently I’m not alone.

These newer services are all getting people to share on them, even though in most cases those users are sharing to a smaller audience than they could reach on Facebook or Twitter. What’s going on here? It seems to me that these services have all realized that the competition for sharing is about more than audience size, and in particular includes the following additional two axes:

  • Ease of sharing to a more specific/targeted audience
  • Ease of sharing more tailored/beautiful content

Sharing to a more specific/targeted audience sounds like the opposite of “sharing where all of my friends/followers already are”, but not everything we say is meant to be heard by everyone. In fact, when I ask people why they don’t share more online, two of the most frequent responses I get have to do with having too much audience: privacy and relevance. Sometimes you don’t want to share something broadly because it’s too personal or sensitive, and sometimes you just don’t want to bug everyone. In both cases, services that help you share more narrowly and with more precision can “win your business” when you otherwise would have shared reluctantly or not at all.

Foursquare, Path, and Google+ (and email) are all good examples of this. Sharing your current location can be both sensitive and noisy, but on foursquare most people maintain a smaller and more highly trusted list of friends, and everyone there has also chosen to use the service for this purpose. Thus it wins on both privacy and relevance, whereas Facebook Places has largely failed to compete, in part because people have too many friends there. Similarly, Path encourages you to only share to your closest set of friends and family, and thus you feel free to share more, both because you trust who’s seeing your information, and because they’re less likely to feel you’re “spamming them” if they’re close to you. And by letting you share to different circles (or publicly) each time you post, Google+ lets you tune both the privacy and relevance of your audience each time you have something to say. Google+ users routinely post to several distinct audiences, showing that we all have more to say if we can easily control who’s listening.

Sharing more tailored/beautiful content is in theory orthogonal to audience size/control, but it’s another instance in which smaller services often have an advantage, because they can specialize in helping users quickly craft and share content that is richer and more visually delightful than they could easily do on a larger and more generic social network. This is an effective axis for competition in sharing because we all want to express ourselves in a way that’s compelling and likely to evoke delight and reaction from our friends/followers. So services that help you look good can again “win your business” when you otherwise would have shared something generic or not at all.

Instagram and Tumblr jump out from my list above as services that have attracted users because they help you “look good for less”, but actually all five services have succeeded here to some extent. A foursquare check-in has rich metadata about the place you’re visiting, so it’s a more meaningful way to share than simply saying “I’m eating at Cafe Gibraltar”. Instagram lets you apply cool filters to your photos, and more importantly IMO, constrains the sharing experience to only be a single photo with a short caption (thus further encouraging this type of sharing). Path just looks beautiful end-to-end, which entices you to live in their world, and they also add lovely touches like displaying the local weather next to your shared moments or letting you easily share when you went to bed and woke up (and how much sleep you got). Again, these are all things you could share elsewhere, but it just feels better and more natural on these more tailored services. Tumblr is “just another blogging tool” in some ways, but its beautiful templates and its focus on quickly reblogging other content along with a quick message has led to an explosion of people starting up their own “tumblelogs”. And on Google+, one of the reasons a thriving photography community quickly formed is just that photos are displayed in a more compelling and engaging way than elsewhere.

The future of social networking will be largely about making it easier to share richer content with a more relevant audience. Some already decry the current “information overload” on social networks, but I would argue that (a) many/most of the meaningful moments in the lives of people I care about are still going un-shared (mainly because it’s too hard), (b) the feeling of overload largely comes from the low “signal-to-noise ratio” of posts shared today (owing to the lack of easy audience targeting), and (c) the content shared today is largely generic and homogeneous, thus it’s harder to pick out the interesting bits at the times when its most relevant. But as long as entrepreneurs can think up new ways to make it easier to capture and share the moments of your life (and the things you find interesting) in beautiful, high fidelity, and make it easier to share those moments with just the right people at the right time, we’ll soon look back on the current state of social networking with the same wistful bemusement we cast today on brick-sized feature phones and black-and-white personal computers. Let’s get to it!

Fighting for the Future of the Social Web: Selling Out and Opening Up (OSCON 2011)

Fighting for the Future of the Social Web: Selling Out and Opening Up
O’Reilly Open Source Convention (OSCON) 2011
Portland, OR
July 27, 2011

(Note: some of the footer fonts are messed up on slideshare, sorry.)

Download PPT (12.5 MB)

A year and a half after joining Google, and a year after my last talk on the Social Web, I returned to OSCON (one of my favorite conferences, which I’ve been speaking at for over half a decade now!) to reflect on the progress we’ve collectively made (and haven’t made) to open up the social web. I covered the latest developments in OpenID, OAuth, Portable Contacts, and related open web standards, mused about the challenges we’re still facing to adoption and ease-of-use and what to do about them, and considered what changes we should expect going forward now that many of the formerly independent open social web enthusiasts (myself included) now work for larger companies.

Not to spoil the punchline, but if you know me at all it won’t surprise you to learn that I’m still optimistic about the future! 😉

Bridging the islands: Building fluid social experiences across websites (Google I/O 2010)

Bridging the islands: Building fluid social experiences across websites
Google I/O 2010
San Francisco, CA
May 19, 2010

View talk and download slides as PDF

My third year speaking at Google I/O, and my first as a Googler! I teamed up with fellow Googler John Panzer, and together we demonstrated how far open standards have come in allowing developers to build rich cross-site social integrations. From frictionless sign-up using OpenID, OAuth, and webfinger to finding your friends with Portable Contacts and microformats to sharing rich activities and holding real-time distributed conversations with ActivityStrea.ms, PubSubHubBub, and salmon, it really is remarkable how much progress we’ve made as a community. And it still feels like we’re just getting started, with the real payoff right around the corner!

We took a literal approach to our concept of “bridging the islands” by telling a story of two imaginary islanders, who meet while on vacation and fall in love. They struggle with all the same problems that users of today’s social web do–the pain of immigrating to a new place, the pain of being able to find your friends once they’ve moved, and the pain of being able to stay in touch with the people you care about, even when you don’t all live in the same place. Besides having fun stretching the metaphor and making pretty slides (special thanks to Chris Messina for his artistic inspiration and elbow grease!), the point is that these are all fundamental problems, and just as we created technology to solve them in the real world, so must be solve them on the Social Web.

Chris’s talk at I/O told this story at a high level and with additional color, while we dove more into the technology that makes it possible. Make sure to check out both talks, and I hope they will both inspire and inform you–whether as a developer or a user–to help us complete this important work as a community!


Implementing PubSubHubbub subscriber support: A step-by-step guide

One of the last things I did before leaving Plaxo was to implement PubSubHubbub (PuSH) subscriber support, so that any blogs which ping a PuSH hub will show up almost instantly in pulse after being published. It’s easy to do (you don’t even need a library!), and it significantly improves the user experience while simultaneously reducing server load on your site and the sites whose feeds you’re crawling. At the time, I couldn’t find any good tutorials for how to implement PuSH subscriber support (add a comment if you know of any), so here’s how I did it. (Note: depending on your needs, you might find it useful instead to use a third-party service like Gnip to do this.)

My assumption here is that you’ve already got a database of feeds you’re subscribing to, but that you’re currently just polling them all periodically to look for new content. This tutorial will help you “gracefully upgrade” to support PuSH-enabled blogs without rewriting your fundamental polling infrastructure. At the end, I’ll suggest a more radical approach that is probably better overall if you can afford a bigger rewrite of your crawling engine.

The steps to add PuSH subscriber support are as follows:

  1. Identify PuSH-enabled blogs extract their hub and topic
  2. Lazily subscribe to PuSH-enabled blogs as you discover them
  3. Verify subscription requests from the hub as you make them
  4. Write an endpoint to receive pings from the hub as new content is published
  5. Get the latest content from updated blogs as you receive pings
  6. Unsubscribe from feeds when they’re deleted from your system

1. Identify PuSH-enabled blogs extract their hub and topic

When crawling a feed normally, you can look for some extra metadata in the XML that tells you this blog is PuSH-enabled. Specifically, you want to look for two links: the “hub” (the URL of the hub that the blog pings every time it has new content, which you in turn communicate with to subscribe and receive pings when new content is published), and the “self” (the canonical URL of the blog you’re subscribing to, which is referred to as the “topic” you’re going to subscribe to from the hub).

A useful test blog to use while building PuSH subscriber support is http://pubsubhubbub-example-app.appspot.com/, since it lets anyone publish new content. If you view source on that page, you’ll notice the standard RSS auto-discovery tag that tells you where to find the blog’s feed:

<link title="PubSubHubbub example app" type="application/atom+xml" rel="alternate" />

And if you view source on http://pubsubhubbub-example-app.appspot.com/feed, you’ll see the two PuSH links advertised underneath the root feed tag:

<link type="application/atom+xml" title="PubSubHubbub example app" rel="self" />
<link rel="hub" href="http://pubsubhubbub.appspot.com/" />

You can see that the “self” link is the same as the URL of the feed that you’re already using, and the “hub” link is to the free hub being hosted on AppEngine at http://pubsubhubbub.appspot.com/. In both cases, you want to look for a link tag under the root feed tag, match the appropriate rel-value (keeping in mind that rel-attributes can have multiple, space-separated values, e.g. rel="self somethingelse", so split the rel-value on spaces and then look for the specific matching rel-value), and then extract the corresponding href-value from that link tag. Note that the example above is an ATOM feed; in RSS feeds, you generally have to look for atom:link tags under the channel tag under the root rss tag, but the rest is the same.

Once you have the hub and self links for this blog (assuming the blog is PuSH-enabled), you’ll want to store the self-href (aka the “topic”) with that feed in your database so you’ll know whether you’ve subscribed to it, and, if so, whether the topic has changed since you last subscribed.

2. Lazily subscribe to PuSH-enabled blogs as you discover them

When you’re crawling a feed and you notice it’s PuSH-enabled, check your feed database to see if you’ve got a stored PuSH-topic for that feed, and if so, whether the current topic is the same as your stored value. If you don’t have any stored topic, or if the current topic is different, you’ll want to talk to that blog’s PuSH hub and initiate a subscription so that you can receive real-time updates when new content is published to that blog. By storing the PuSH-topic per-feed, you can effectively “lazily subscribe” to all PuSH-enabled blogs by continuing to regularly poll and crawl them as you currently do, and adding PuSH subscriptions as you find them. This means you don’t have to do any large one-time migration over to PuSH, and you can automatically keep up as more blogs become PuSH-enabled or change their topics over time. (Depending on your crawling infrastructure, you can either initiate subscriptions as soon as you find the relevant tags, or you can insert an asynchronous job to initiate the subscription so that some other part of your system can handle that later without slowing down your crawlers.)

To subscribe to a PuSH-enabled blog, just send an HTTP POST to its hub URL and provide the following POST parameters:

  • hub.callback = [the URL of your endpoint for receiving pings, which we’ll build in step 4]
  • hub.mode = subscribe
  • hub.topic = [the self-link / topic of the feed you’re subscribing to, which you extracted in step 1]
  • hub.verify = async [means the hub will separately call you back to verify this subscription]
  • hub.verify_token = [a hard-to-guess token associated with this feed, which the hub will echo back to you to prove it’s a real subscription verification]

For the hub.callback URL, it’s probably best to include the internal database ID of the feed you’re subscribing to, so it’s easy to look up that feed when you receive future update pings. Depending on your setup, this might be something like http://yoursite.com/push/update?feed_id=123 or http://yoursite.com/push/update/123. Another advantage of this technique is that it makes it relatively hard to guess what the update URL is for an arbitrary blog, in case an evil site wanted to send you fake updates. If you want even more security, you could put some extra token in the URL that’s different per-feed, or you could use the hub.secret mechanism when subscribing, which will cause the hub to send you a signed verification header with every ping, but that’s beyond the scope of this tutorial.

For the hub.verify_token, the simplest thing would just be to pick a secret word (e.g. “MySekritVerifyToken“) and always use that, but an evil blog could use its own hub and quickly discover that secret. So a better idea is to do something like take the HMAC-SHA1 of the topic URL along with some secret salt you keep internally. This way, the hub.verify_token value is feed-specific, but it’s easy to recompute when you receive the verification.

If your subscription request is successful, the hub will respond with an HTTP 202 “Accepted” code, and will then proceed to send you a verification request for this subscription at your specified callback URL.

3. Verify subscription requests from the hub as you make them

Shortly after you send your subscription request to the hub, it will call you back at the hub.callback URL you specified with an HTTP GET request containing the following query parameters:

  • hub.mode = subscribe
  • hub.topic = [the self-link / topic of the URL you requested a subscription for]
  • hub.challenge = [a random string to verify this verification that you have to echo back in the response to acknowledge verification]
  • hub.verify_token = [the value you sent in hub.verify_token during your subscription request]

Since the endpoint you receive this verification request is the same one you’ll receive future update pings on, your logic has to first look for hub.mode=subscribe, and if so, verify that the hub sent the proper hub.verify_token back to you, and then just dump out the hub.challenge value as the response body of your page (with a standard HTTP 200 response code). Now you’re officially subscribed to this feed, and will receive update pings when the blog publishes new content.

Note that hubs may periodically re-verify that you still want a subscription to this feed. So you should make sure that if the hub makes a similar verification request out-of-the-blue in the future, you respond the same way you did the first time, providing you indeed are still interested in that feed. A good way to do this is just to look up the feed every time you get a verification request (remember, you build the feed’s ID into your callback URL), and if you’ve since deleted or otherwise stopped caring about that feed, return an HTTP 404 response instead so the hub will know to stop pinging you with updates.

4. Write an endpoint to receive pings from the hub as new content is published

Now you’re ready for the pay-out–magically receiving pings from the ether every time the blog you’ve subscribed to has new content! You’ll receive inbound requests to your specified callback URL without any additional query parameters added (i.e. you’ll know it’s a ping and not a verification because there won’t be any hub.mode parameter included). Instead, the new entries of the subscribed feed will be included directly in the POST body of the request, with a request Content-Type of application/atom+xml for ATOM feeds and application/rss+xml for RSS feeds. Depending on your programming language of choice, you’ll need to figure out how to extract the raw POST body contents. For instance, in PHP you would fopen the special filename php://input to read it.

5. Get the latest content from updated blogs as you receive pings

The ping is really telling you two things: 1) this blog has updated content, and 2) here it is. The advantage of providing the content directly in the ping (a so-called “fat ping“) is so that the subscriber doesn’t have to go re-crawl the feed to get the updated content. Not only is this a performance savings (especially when you consider that lots of subscribers may get pings for a new blog post at roughly the same time, and they might otherwise all crawl that blog at the same time for the new contents; the so-called “thundering herd” problem), it’s also a form of robustness since some blogging systems take a little while to update their feeds when a new post is published (especially for large blogging systems that have to propagate changes across multiple data-centers or update caching tiers), so it’s possible you’ll receive a ping before the content is available to crawl directly. For these reasons and more, it’s definitely a best-practice to consume the fat ping directly, rather than just using it as a hint to go crawl the blog again (i.e. treating it as a “light ping”).

That being said, most crawling systems are designed just to poll URLs and look for new data, so it may be easier to start out by taking the “light ping” route. In other words, when you receive a PuSH ping, look up the feed ID from the URL of the request you’re handling, and assuming that feed is still valid, just schedule it to crawl ASAP. That way, you don’t have to change the rest of your crawling infrastructure; you just treat the ping as a hint to crawl now instead of waiting for the next regular polling interval. While sub-optimal, in my experience this works pretty well and is very easy to implement. (It’s certainly a major improvement over just polling with no PuSH support!) If you’re worried about crawling before the new content is in the feed, and you don’t mind giving up a bit of speed, you can schedule your crawler for “in N seconds” instead of ASAP, which in practice will allow a lot of slow-to-update feeds to catch up before you crawl them.

Once you’re ready to handle the fat pings directly, extract the updated feed entries from the POST body of the ping (the payload is essentially an exact version of the full feed you’d normally fetch, except it only contains entries for the new content), and ingest it however you normally ingest new blog content. In fact, you can go even further and make PuSH the default way to ingest blog content–change your polling code to act as a “fake PuSH proxy” and emit PuSH-style updates whenever it finds new entries. Then your core feed-ingesting code can just process all your updated entries in the same way, whether they came from a hub or your polling crawlers.

However you handle the pings, once you find that things are working reliably, you can change the polling interval for PuSH-enabled blogs to be much slower, or even turn it off completely, if you’re not worried about ever missing a ping. In practice, slow polling (e.g. once a day) is probably still a good hedge against the inevitable clogs in the internet’s tubes.

6. Unsubscribe from feeds when they’re deleted from your system

Sometimes users will delete their account on your system or unhook one of their feeds from their account. To be a good citizen, rather than just waiting for the next time the hub sends a subscription verification request to tell it you no longer care about this feed, you should send the hub an unsubscribe request when you know the feed is no longer important to you. The process is identical to subscribing to a feed (as described in steps 2 and 3), except you use “unsubscribe” instead of “subscribe” for the hub.mode values in all cases.

Testing your implementation

Now that you know all the steps needed to implement PuSH subscriber support, it’s time to test your code in the wild. Probably the easiest way is to hook up that http://pubsubhubbub-example-app.appspot.com/ feed, since you can easily add content it to it to test pings, and it’s known to have valid hub-discovery metadata. But you can also practice with any blog that is PuSH-enabled (perhaps your shiny new Google Buzz public posts feed?). In any case, schedule it to be crawled normally, and verify that it correctly extracts the hub-link and self-link and adds the self-link to your feed database.

The first time it finds these links, it should trigger a subscription request. (On subsequent crawls, it shouldn’t try to subscribe again, since the topic URL hasn’t changed. ) Verify that you’re sending a request to the hub that includes all the necessary parameters, and verify that it’s sending you back a 202 response. If it’s not working, carefully check that you’re sending all the right parameters.

Next, verify that upon sending a subscription request, you’ll soon get an inbound verification request from the hub. Make sure you detect requests to your callback URL with hub.mode=subscribe, and that you are checking the hub.verify_token value against the value you sent in the subscription request, and then that you’re sending the hub.challenge value as your response body. Unfortunately, it’s usually not easy to inspect the hub directly to confirm that it has properly verified your subscription, but hopefully some hubs will start providing site-specific dashboards to make this process more transparent. In the meantime, the best way to verify that things worked properly is to try making test posts to the blog and looking for incoming pings.

So add a new post on the example blog, or write a real entry on your PuSH-enabled blog of choice, and look in your server logs to make sure a ping came in. Depending on the hub, the ping may come nearly instantaneously or after a few seconds. If you don’t see it after several seconds, something is probably wrong, but try a few posts to make sure you didn’t just miss it. Look at the specific URL that the hub is calling on your site, and verify that it has your feed ID in the URL, and that it does indeed match the feed that just published new content. If you’re using the “light ping” model, check that you scheduled your feed to crawl ASAP. If you’re using the “fat ping” model, check that you correctly ingested the new content that was in the POST body of the ping.

Once everything appears to be working, try un-hooking your test feed (and/or deleting your account) and verify that it triggers you to send an unsubscribe request to the hub, and that you properly handle the subsequent unsubscribe verification request from the hub.

If you’ve gotten this far, congratulations! You are now part of the real-time-web! Your users will thank you for making their content show up more quickly on your site, and the sites that publish those feeds will thank you for not crawling them as often, now that you can just sit back and wait for updates to be PuSH-ed to you. And I and the rest of the community will thank you for supporting open standards for a decentralized social web!

(Thanks to Brett Slatkin for providing feedback on a draft of this post!)

The Social Web: An Implementer’s Guide (Google I/O 2009)

The Social Web: An Implementer’s Guide
Google I/O 2009
San Francisco, CA
May 28, 2009

Download PPT (7.3 MB)

Google invited me back for a second year in a row to speak at their developer conference about the state-of-the-art of opening up the social web. While my talk last year laid out the promise and vision of an interoperable social web ecosystem, this year I wanted to show all the concrete progress we’ve made as an industry in achieving that goal. So my talk was full of demos–signing up for Plaxo with an existing Gmail account in just two clicks, using MySpaceID to jump into a niche music site without a separate sign-up step, ending “re-friend madness” by honoring Facebook friend connections on Plaxo (via Facebook Connect), killing the “password anti-pattern” with user-friendly contact importers from a variety of large sites (demonstrated with FriendFeed), and sharing activity across sites using Google FriendConnect and Plaxo. Doing live demos is always a risky proposition, especially when they involve cross-site interop, but happily all the demos worked fine and the talk was a big success!

I began my talk by observing that the events of the last year has made it clear: The web is going social, and the social web is going open. By the end of my talk, having showed so many mainstream sites with deep user-friendly and user-friendly interoperability, I decided to go a step further and declare: The web is now social, and the social web is now open. You don’t have to wait any longer to start reaping the benefits. It’s time to dive in.

Implementing OAuth is still too hard… but it doesn’t have to be

I recently helped Dave Winer debug his OAuth Consumer code, and the process was more painful than it should have been. (He was trying to write a Twitter app using their beta OAuth support, and since he has his own scripting environment for his OPML editor, there wasn’t an existing library he could just drop in.) Now I’m a big fan of OAuth–it’s a key piece of the Open Stack, and it really does work well once you get it working. I’ve written both OAuth Provider and Consumer code in multiple languages and integrated with OAuth-protected APIs on over half a dozen sites. I’ve also helped a lot of developers and companies debug their OAuth implementations and libraries. And the plain truth is this: it’s empirically way too painful still for first-time OAuth developers to get their code working, and despite the fact that OAuth is a standard, the empirical “it-just-works-rate” is way too low.

We in the Open Web community should all be concerned about this, since OAuth is the “gateway” to most of the open APIs we’re building, and quite often this first hurdle is the hardest one in the entire process. That’s not the “smooth on-ramp” we should be striving for here. We can and should do better, and I have a number of suggestions for how to do just that.

To some extent, OAuth will always be “hard” in the sense that it’s crypto–if you get one little bit wrong, the whole thing doesn’t work. The theory is, “yeah it might be hard the first time, but at least you only have to suffer that pain once, and then you can use it everywhere”. But even that promise falls short because most OAuth libraries and most OAuth providers have (or have had) bugs in them, and there aren’t good enough debugging, validating, and interop tools available to raise the quality bar without a lot of trial-and-error testing and back-and-forth debugging. I’m fortunate in that a) I’ve written and debugged OAuth code so many times that I”m really good at it now, and b) I personally know developers at most of the companies shipping OAuth APIs, but clearly most developers don’t have those luxuries, nor should they have to.

After I helped Dave get his code working, he said “you know, what you manually did for me was perfect. But there should have been a software tool to do that for me automatically”. He’s totally right, and I think with a little focused effort, the experience of implementing and debugging OAuth could be a ton better. So here are my suggestions for how to help make implementing OAuth easier. I hope to work on some or all of these in my copious spare time, and I encourage everyone that cares about OAuth and the Open Stack to pitch in if you can!

  • Write more recipe-style tutorials that take developers step-by-step through the process of building a simple OAuth Consumer that works with a known API in a bare-bones, no-fluff fashion. There are some good tutorials out there, but they tend to be longer on theory and shorter on “do this, now do this, now you should see that, …”, which is what developers need most to get up and running fast. I’ve written a couple such recipes so far–one for becoming an OpenID relying party, and one for using Netflix’s API–and I’ve gotten tremendous positive feedback on both, so I think we just need more like that.
  • Build a “transparent OAuth Provider” that shows the consumer exactly what signature base string, signature key, and signature it was expecting for each request. One of the most vexing aspects of OAuth is that if you make a mistake, you just get a 401 Unauthorized response with little or no debugging help. Clearly in a production system, you can’t expect the provider to dump out all the secrets they were expecting, but there should be a neutral dummy-API/server where you can test and debug your basic OAuth library or code with full transparency on both sides. In addition, if you’re accessing your own user-data on a provider’s site via OAuth, and you’ve logged in via username and password, there should be a special mode where you can see all the secrets, base strings, etc. that they’re expecting when you make an OAuth-signed request. (I plan to add this to Plaxo, since right now I achieve it by grepping through our logs and them IMing with the developers who are having problems, and this is, uhh, not scalable.)
  • Build an OAuth validator for providers and consumers that simulates the “other half” of the library (i.e. a provider to test consumer-code and a consumer to test provider-code) and that takes the code through a bunch of different scenarios, with detailed feedback at each step. For instance, does the API support GET? POST? Authorization headers? Does it handle empty secrets properly? Does it properly encode special characters? Does it compute the signature properly for known values? Does it properly append parameters to the oauth_callback URL when redirecting? And so on. I think the main reason that libraries and providers so far have all had bugs is that they really didn’t have a good way to thoroughly test their code. As a rule, if you can’t test your code, it will have bugs. So if we just encoded the common mistakes we’ve all seen in the field so far and put those in a validator, future implementations could be confident that they’ve nailed all the basics before being released in the wild. (And I’m sure we’d uncover more bugs in our existing libraries and providers in the process!)
  • Standardize the terms we use both in our tutorials and libraries. The spec itself is pretty consistent, but it’s already confusing enough to have a “Consumer Token”, “Request Token”, and “Access Token”, each of which consist of a “Token Key” and “Token Secret”, and it’s even more confusing when these terms aren’t used with exact specificity. It’s too easy to just say “token” to mean “request token” or “token” to mean “token key”–I do it all the time myself, but we really need to keep ourselves sharp when trying to get developers to do the right thing. Worse still, all the existing libraries use different naming conventions for the functions and steps involved, so it’s hard to write tutorials that work with multiple libraries. We should do a better job of using specific and standard terms in our tutorials and code, and clean up the stuff that’s already out there.
  • Consolidate the best libraries and other resources so developers have an easier time finding out what the current state-of-the-art is. Questions that should have obvious and easily findable answers include: is there an OAuth library in my language? If so, what’s the best one to use? How much has it been tested? Are their known bugs? Who should I contact if I run into problems using it? What are the current best tutorials, validators, etc. for me to use? Which companies have OAuth APIs currently? What known issues exist for each of those providers? Where is the forum/mailing-list/etc for each of those APIs? Which e-mail list(s) should I send general OAuth questions to? Should I feel confident that emails sent to those lists will receive prompt replies? Should I expect that bug reports or patches I submit there will quickly find their way to the right place? And so on.
  • Share more war stories of what we’ve tried, what hasn’t worked, and what we had to do to make it work. I applauded Dave for suffering his developer pain in public via his blog, and I did the same when working with Netflix’s API, but if we all did more of that, our collective knowledge of bugs, patterns, tricks, and solutions would be out there for others to find and benefit form. I should do more of that myself, and if you’ve ever tried to use OAuth, write an OAuth library, or build your own provider, you should too! So to get things started: In Dave’s case, the ultimate problem turned out to be that he was using his Request Secret instead of his Access Secret when signing API requests. Of course this worked when hitting the OAuth endpoint to get his Access token in the first place, and it’s a subtle difference (esp. if you don’t fully grok what all these different tokens are for, which most people don’t), but it didn’t work when hitting a protected API, and there’s no error message on any provider that says “you used the wrong secret when signing your request” since the secrets are never transmitted directly. The way I helped him debug it was to literally watch our debugging logs (which spit out all the guts of the OAuth signing process, including Base String, Signature Key, and final Signature), and then I sent him all that info and asked him to print out the same info on his end and compare the two. Once he did that, it was easy to spot and fix the mistake. But I hope you can see how all of the suggestions above would have helped make this process a lot quicker and less painful.

What else can we as a community do to make OAuth easier for developers? Add your thoughts here or in your own blog post. As Dave remarked to me, “the number of OAuth developers out there is about to skyrocket” now that Google, Yahoo, MySpace, Twitter, Netflix, TripIt, and more are providing OAuth-protected APIs. So this is definitely the time to put in some extra effort to make sure OAuth can really achieve its full potential!

Using Netflix’s New API: A step-by-step guide

Netflix announces an APIAs a longtime avid Netflix fan, I was excited to see that they finally released an official API today. As an avid fan of the Open Web, I was even more excited to see that this API gives users full access to their ratings, reviews, and queue, and it does so using a familiar REST interface, with output available in XML, JSON, and ATOM. It even uses OAuth to grant access to protected user data, meaning you can pick up an existing OAuth library and dive in (well, almost, see below). Netflix has done a great job here, and deserves a lot of kudos!

Naturally, I couldn’t wait to get my hands on the API and try it out for real. After a bit of tinkering, I’ve now got it working so it gives me my own list of ratings, reviews, and recently returned movies, including as an ATOM feed that can be embedded as-is into a feed reader or aggregator. It was pretty straightforward, but I noticed a couple of non-standard things and gotchas along the way, so I thought it would be useful to share my findings. Hopefully this will help you get started with Netflix’s API even faster than I did!

So here’s how to get started with the Netflix API and end up with an ATOM feed of your recently returned movies:

  1. Sign up for mashery (which hosts Netflix’s API) at http://developer.netflix.com/member/register (you have to fill out some basic profile info and respond to an email round-trip)
  2. Register for an application key at http://developer.netflix.com/apps/register (you say a bit about what your app does and it gives you a key and secret). When you submit the registration, it will give you a result like this:
    Netflix API: k5mds6sfn594x4drvtw96n37   Shared Secret: srKNVRubKX

    The first string is your OAuth Consumer Key and the second one is your OAuth Consumer Secret. I’ve changed the secret above so you don’t add weird movies to my account, but this gives you an idea of what it looks like. 🙂

  3. Get an OAuth request token. If you’re not ready to start writing code, you can use an OAuth test client like http://term.ie/oauth/example/client.php. It’s not the most user-friendly UI, but it will get the job done. Use HMAC-SHA1 as your signature method, and use http://api.netflix.com/oauth/request_token as the endpoint. Put your newly issued consumer key and secret in the spaces below, and click the “request_token” button. If it works, you’ll get a page with output like this:
    oauth_token=bpn8ycnma7hzuwec5dmt8f2j&oauth_token_secret=DArhPYzsUCkz&application_name=JosephSmarrTestApp&login_url=https%3A%2F%2Fapi-user.netflix.com%2Foauth%2Flogin%3Foauth_token%3Dbpn8ycnma7hzuwec5dmt8f2j

    Your OAuth library should parse this for you, but if you’re playing along in the test client, you’ll have to pull out the OAuth Request Token (in this case, bpn8ycnma7hzuwec5dmt8f2j) and OAuth Request Secret (DArhPYzsUCtt). Note it also tells you the application_name you registered (in this case, JosephSmarrTestApp), which you’ll need for the next step (this is not a standard part of OAuth, and not sure why they require you to pass it along). They also give you a login_url, which is also non-standard, and doesn’t actually work, since you need to append additional parameters to it.

  4. Ask the user to authorize your request token. Here the OAuth test client will fail you because Netflix requires you to append additional query parameters to the login URL, and the test client isn’t smart about merging query parameters on the endpoint URL with the OAuth parameters it adds. The base login URL is https://api-user.netflix.com/oauth/login and as usual you have to append your Request Token as oauth_token=bpn8ycnma7hzuwec5dmt8f2j and provide an optional callback URL to redirect to the user to upon success. But it also makes you append your OAuth Consumer Key and application name, so the final URL you need to redirect your user to looks like this:

    This is not standard behavior, and it will probably cause unnecessary friction for developers, but now you know. BTW if you’re getting HTTP 400 errors on this step, try curl-ing the URL on the command line, and it will provide a descriptive error message that may not show up in your web browser. For instance, if you leave out the application name, e.g.

    curl ‘https://api-user.netflix.com/oauth/login?oauth_token=bpn8ycnma7hzuwec5dmt8f2j&oauth_callback=YOUR_CALLBACK_URL&oauth_consumer_key=k5mds6sfn594x4drvtw96n37’

    You’ll get the following XML response (I’ve replaced the angle brackets with [] because wordpress keeps eating my escaped tags, grr):

    [status]
      [status_code]400[/status_code]
      [message]application_name is missing[/message]
    [/status]

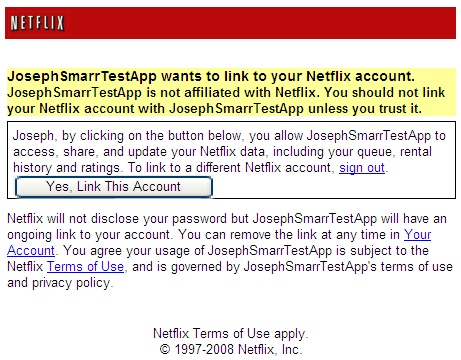
    If your login URL is successfully constructed, it will take the user to an authorization page that looks like this:
    Netflix OAuth authorization page

    If the user approves, they’ll be redirected back to your oauth_callback URL (if supplied), and your request token has now been authorized.

  5. Exchange your authorized request token for an access token. You can use the OAuth test client again for this, and it’s basically just like getting the request token, except the endpoint is http://api.netflix.com/oauth/access_token and you need to fill out both your consumer token and secret as well as your request token and secret. Then click the access_token button, and you should get a page with output like this:
    oauth_token=T1lVQLSlIW38NDgeumjnyypbxc6yHD0xkaD21d8DpLVaIs3d2T1Aq_yeOor9PCIW2Bz5ksIPr7aXBKvTTg599m9Q–&user_id=T1G.NK54IqxGkXi3RbkKgudF3ZFkmopPt3lR.dlOLC898-&oauth_token_secret=AKeGYam8NJ4X

    (Once again I’ve altered my secret to protect the innocent.) In addition to providing an OAuth Access Token and OAuth Access Secret (via the oauth_token and oauth_token_secret parameters, respectively), you are also given the user_id for the authorized user, which you need to use when constructing the full URL for REST API calls. This is non-standard for OAuth, and you may need to modify your OAuth library to return this additional parameter, but that’s where you get it. (It would be nice if you could use an implicit userID in API URLs like @me, and it could be interpreted as “the user that granted this access token”, so you could skip this step of having to extract and use an explicit userID; that’s how Portable Contacts and OpenSocial get around this problem. Feature request, anyone?)

  6. Use your access token to fetch the user’s list of protected feeds. Having now successfully gone through the OAuth dance, you’re now ready to make your first protected API call! You can browse the list of available API calls at http://developer.netflix.com/docs/REST_API_Reference and in each case, the URL starts out as http://api.netflix.com/ and you append the path, substituting the user_id value you got back with your access token wherever the path calls for userID. So for instance, to get the list of protected ATOM feeds for the user, the REST URL is http://api.netflix.com/users/userID/feeds, or in this case http://api.netflix.com/users/T1G.NK54IqxGkXi3RbkKgudF3ZFkmopPt3lR.dlOLC898-/feeds.

    Here’s where the OAuth test client is a bit confusing: you need put that feeds URL as the endpoint, fill out the consumer key and secret as normal, and fill out your *access* token and secret under the “request token / secret” fields, then click the “access_token” button to submit the OAuth-signed API request. If it works, you’ll get an XML response with a bunch of links to different protected feeds available for this user. Here’s an example of the response, showing just a couple of the returned links, and again with angle brackets replaced with square brackets to appease my lame wordpress editor:

    Each link contains an href attribute pointing to the actual feed URL, as well as a rel attribute describing the type of data available for that link, and a human-readable title attribute. In our case, we want the “Titles Returned Recently” feed, which is available at http://api.netflix.com/users/T1G.NK54IqxGkXi3RbkKgudF3ZFkmopPt3lR.dlOLC898-/rental_history/returned?feed_token=T1ksEAR97Ki14sIyQX2pfnGH0Llom4eaIDMwNWlUOmRZ0duD2YDbp_5PPUKBcedH51XSxPTnUOI5rCLz9feBXx9A–&oauth_consumer_key=k5mds6sfn594x4drvtw96n37&output=atom (note the XML escapes &s in URLs as XML entities, so you have to un-escape them to get the actual URL). As you can see, this feed URL looks like a normal API request, including my userID on the path, but with an extra feed_token parameter, which is different for each available user feed. This way, the ATOM feed can be fetched without having to do any OAuth signing, so you can drop it in your feed reader or aggregator of choice and it should just work. And giving access to one feed won’t let anyone access your other feeds, since they’re each protected with their own feed_token values.

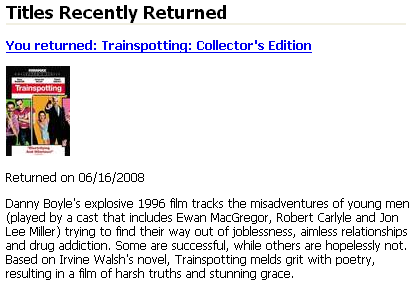
  7. Fetch the feed of recently returned movies. Now you can just fetch the feed URL you found in the previous step (in my case, http://api.netflix.com/users/T1G.NK54IqxGkXi3RbkKgudF3ZFkmopPt3lR.dlOLC898-/rental_history/returned?feed_token=T1ksEAR97Ki14sIyQX2pfnGH0Llom4eaIDMwNWlUOmRZ0duD2YDbp_5PPUKBcedH51XSxPTnUOI5rCLz9feBXx9A–&oauth_consumer_key=k5mds6sfn594x4drvtw96n37&output=atom), and you’ll get nicely formatted “blog posts” back for each movie the user recently returned. Here’s a sample of how the formatted ATOM entries look:
    Netflix rental returns as a feed
    Of course, if you want to format the results differently, you can make a REST API call for the same data, e.g. http://api.netflix.com/users/userID/rental_history/returned OAuth-sign it like you did in step 6, and you’ll get all the meta-data for each movie returned as XML, including various sizes of movie poster image.
  8. Profit! Now you’ve got a way to let your users provide access to their netflix data, which you can use in a variety of ways to enhance your site. If this is the first time you’ve used OAuth, it might have seemed a little complex, but the good news is it’s the same process for all other OAuth-protected APIs you may want to use in the future.

I hope you found this helpful. If anything is confusing, or if I made any mistakes in my write-up, please leave a comment so I can make it better. Otherwise, let me know when you’ve got your Netflix integration up and running!

Performance Challenges for the Open Web (Stanford CS193H)

Performance Challenges for the Open Web
Stanford CS193H: High Performance Web Sites
Stanford, CA
September 29, 2008

Download PPT (6.8 MB)

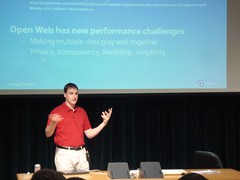
Open Web brings new performance challengesWeb site performance guru Steve Souders is teaching a class at Stanford this fall on High Performance Web Sites (CS193H). He invited me to give a guest lecture to his class on the new performance challenges emerging from our work to open up the social web. As a recent Stanford alum (SSP ’02, co-term ’03), it was a thrill to get to teach a class at my alma mater, esp. in the basement of the Gates bldg, where I’ve taken many classes myself.

I originally met Steve at OSCON 07 when I was working on high-performance JavaScript, and we were giving back-to-back talks. We immediately hit it off and have remained in good touch since. Over the last year or so, however, my focus has shifted to opening up the social web. So when Steve asked me to speak at his class, my first reaction was “I’m not sure I could tell your students anything new that isn’t already in your book”.

But upon reflection, I realized that a lot of the key challenges in creating a truly social web are directly related to performance, and the set of performance challenges in this space are quite different than in optimizing a single web site. In essence, the challenge is getting multiple sites to work together and share content in a way that’s open and flexible but also tightly integrated and high-performance. Thus my new talk was born.

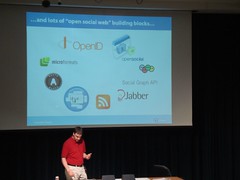
Lots of open building blocksI provided the students with an overview of the emerging social web ecosystem, and some of the key open building blocks making it possible (OpenID, OAuth, OpenSocial, XRDS-Simple, microformats, etc.). I then gave some concrete examples of how these building blocks can play together, and that led naturally into a discussion of the performance challenges involved.

I broke the challenges into four primary categories:

  • minimizing round trips (the challenge is combining steps to optimize vs. keeping the pieces flexible and simple),
  • caching (storing copies of user data for efficiency vs. always having a fresh copy),
  • pull vs. push (the difficulty of scaling mass-polling and the opportunities presented by XMPP and Gnip to decrease both latency and load), and
  • integrating third-party content (proxying vs. client-side fetching, iframes vs. inline integration, etc.).

In each of these cases, there are fundamental trade-offs to make, so there’s no “easy, right answer”. But by understanding the issues involved, you can make trade-offs that are tailored to the situation at hand. Some of the students in that class will probably be writing the next generation of social apps, so I’m glad they can start thinking about these important issues today.

The Future of Social Networks (Future of Web Apps Miami)

The Future of Social Networks
Future of Web Apps Miami (with Tantek Çelik and Brian Oberkirch)
Miami, FL
February 29, 2008

View Slides (slideshare)
Download MP3 Audio (37.3 MB)

In addition to the half-day workshop I presented at FOWA Miami, I also gave a talk as part of the main event with Tantek and Brian Orberkirch (who also has a great write-up of our talk) on The Future of Social Networks. I summarized my remarks in my previous FOWA post, but I wanted to add a separate post for this talk so I could link to the slides and audio (and video should be available soon as well). FOWA was a great event, and I’m eager for the next one!

« Older posts

© 2025 Joseph Smarr

Theme by Anders NorenUp ↑